
In this post, we will be taking a break from Fusion360 and GD&T and we’ll be focusing on project management software. Over the next few posts, we will cover how your team can leverage Asana and Instagantt during your project management process. Today, we will learn how to use Asana’s custom fields in Instagantt in five easy steps.
What is Asana?
Asana is a powerful cloud-based task management solution. Asana’s mission is “to help humanity thrive by enabling the world’s teams to work together effortlessly.” Asana integrates with many other apps allowing teams to focus in one space. One of our favourite integrations is Instagantt.
Disclaimer: I love Asana and am an Asana Certified Pro. I participate in Asana’s referral program and may receive a commission for purchases made through affiliate links. Start your journey with Asana today here!
![]()
What is Instagantt?
Instagantt is a project management software that might look a little familiar to those who have worked with Microsoft® Project. This is because Instagantt allows us to create sophisticated Gantt charts. Additionally, we also have access to workload management making it a useful asset during project schedule management (I will be italicizing project management terms from the PMBOK® Guide – Sixth Edition). At $7 USD/month for a single subscription (on June 17th, 2021) it is an affordable stand-alone solution.
The five steps: Use Asana’s Custom Fields in Instagantt
We are going to assume that you are familiar with the basics of Asana and Instagantt as well as integrating apps in Asana. Both websites have great resources that can help you get started (leave a comment or reach out if you need help getting started).
Step 1: Connect an Asana project to Instagantt
- Create a new project or select an existing Asana project.
- Navigate to Instagantt and login with Asana.
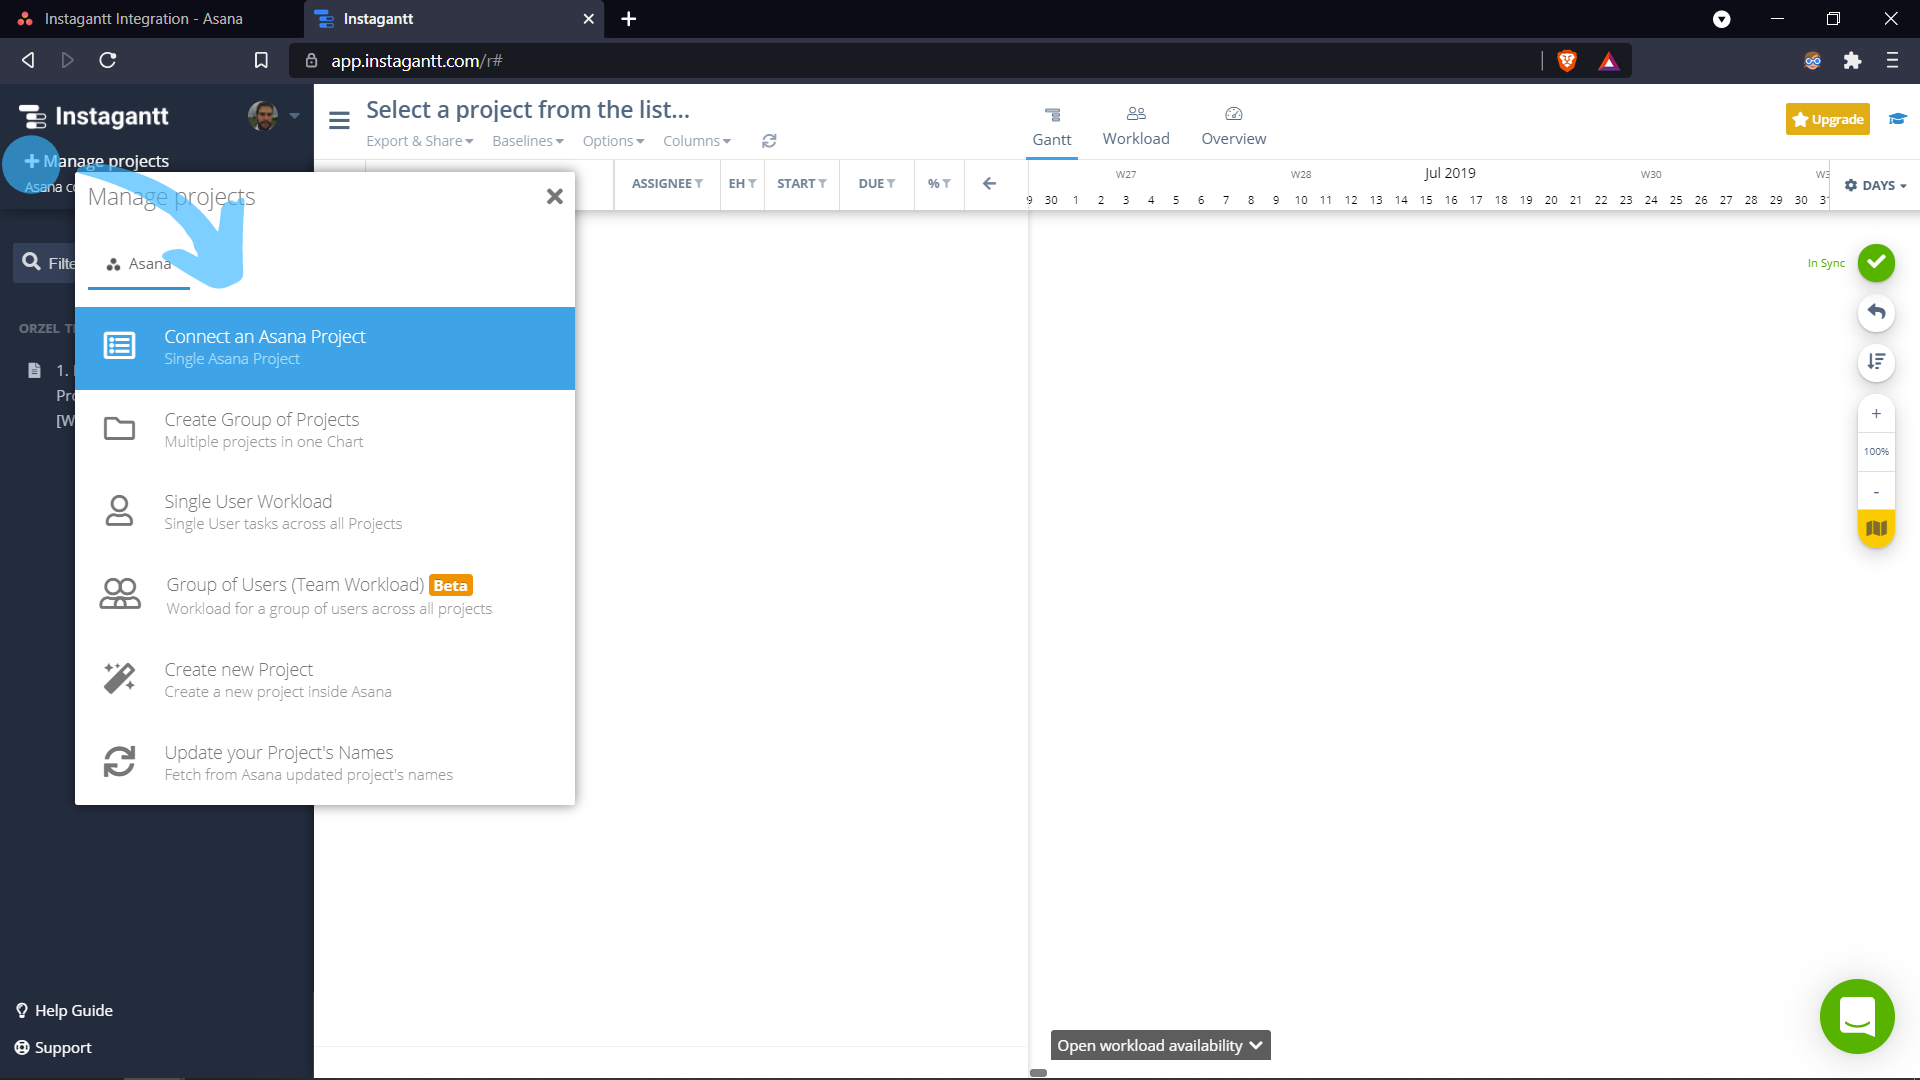
- Select the Manage projects menu and select Connect an Asana project.
- Connect the project(s) you desire from the list (we will cover the benefits of managing groups i.e., multiple projects together in a future post).


Step 2: Determine which custom fields you want to use
Instagantt has a few Columns that can be toggled on/off from the Columns drop-down menu. These columns include the custom fields that can be created in Asana and synced with Instagantt.
- Estimated hours (numerical value)
- Actual hours (numerical value)
- Estimated cost (numerical value with selectable currency symbol and two decimal places)
- Actual cost (numerical value with selectable currency symbol and two decimal places)
- Risk (numerical value from one to five displayed as a series of red vertical bars)
- Priority (numerical value from one to five displayed as a series of green vertical bars)

Step 3: Create custom fields in Asana
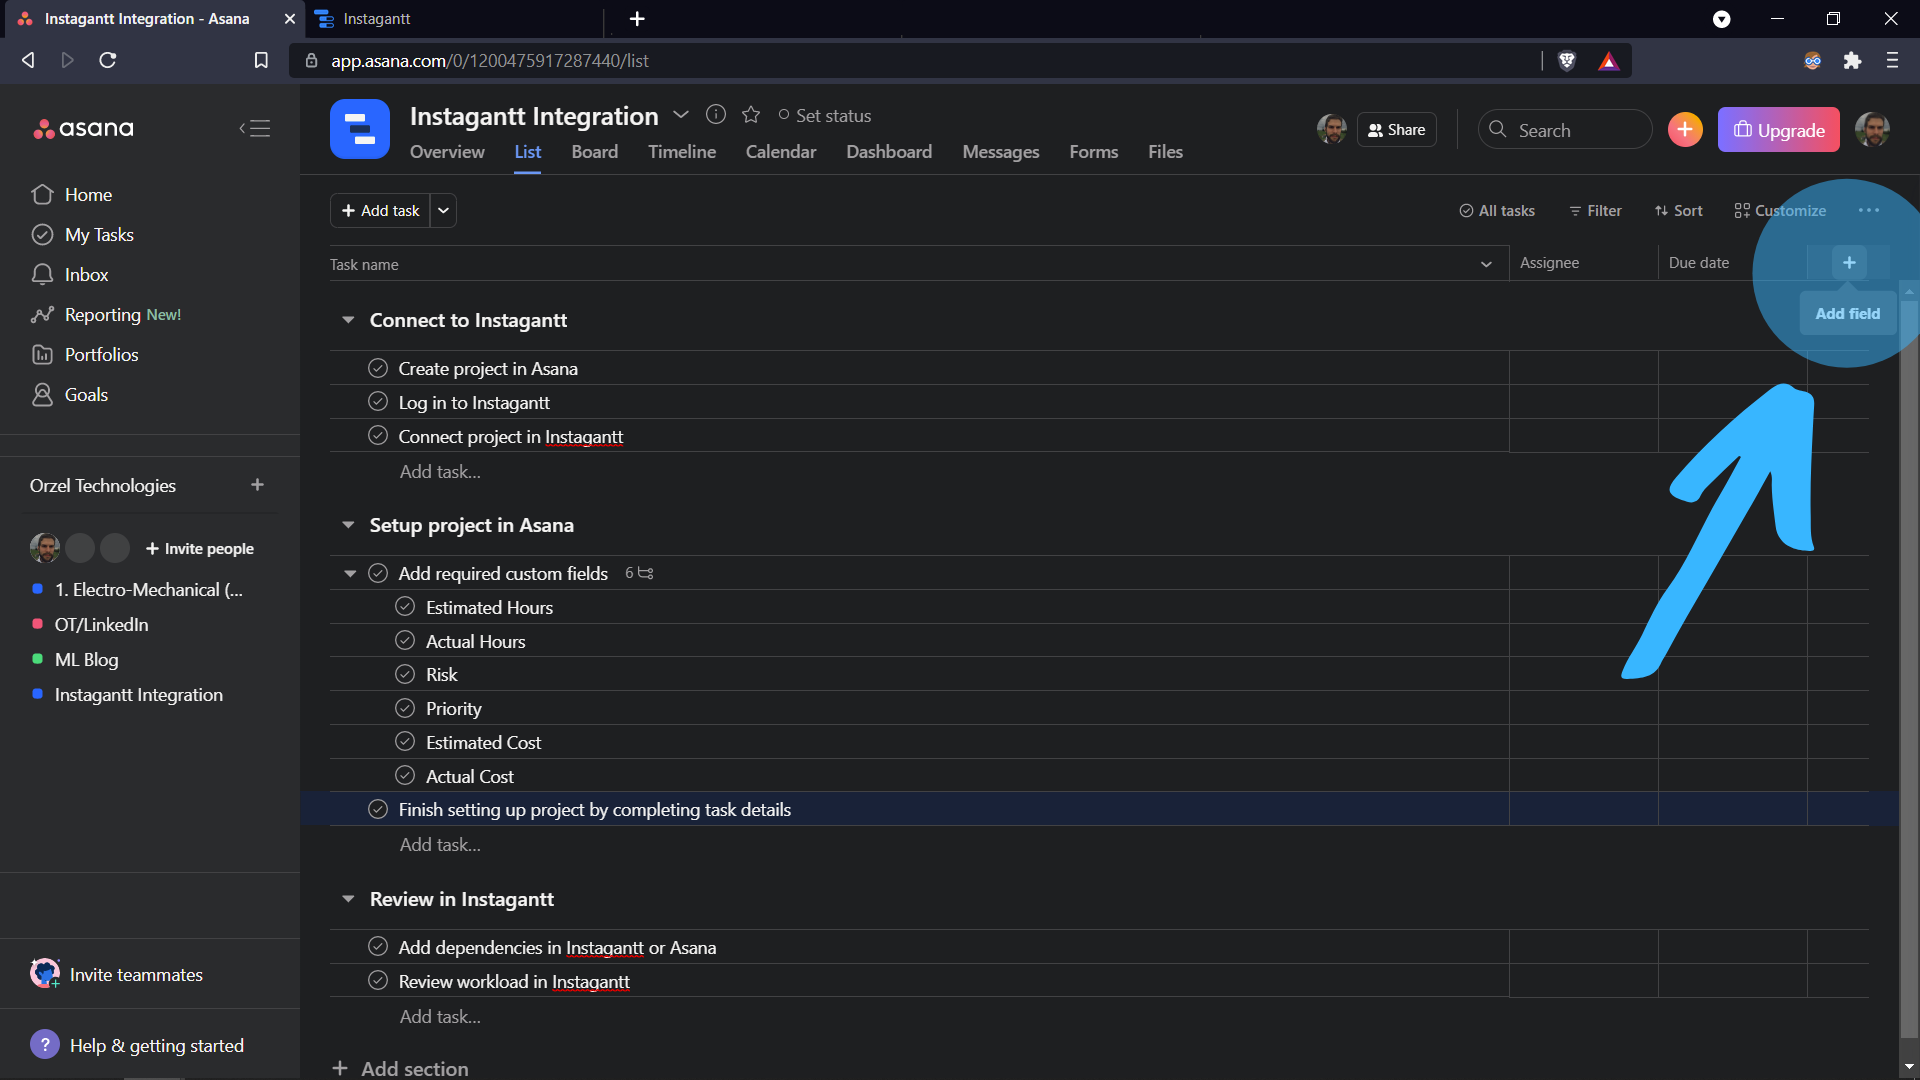
Navigate back to your Asana project and create the required custom fields
- Press on the Add Field button (“+”) – which can also be accessed from the Customize menu
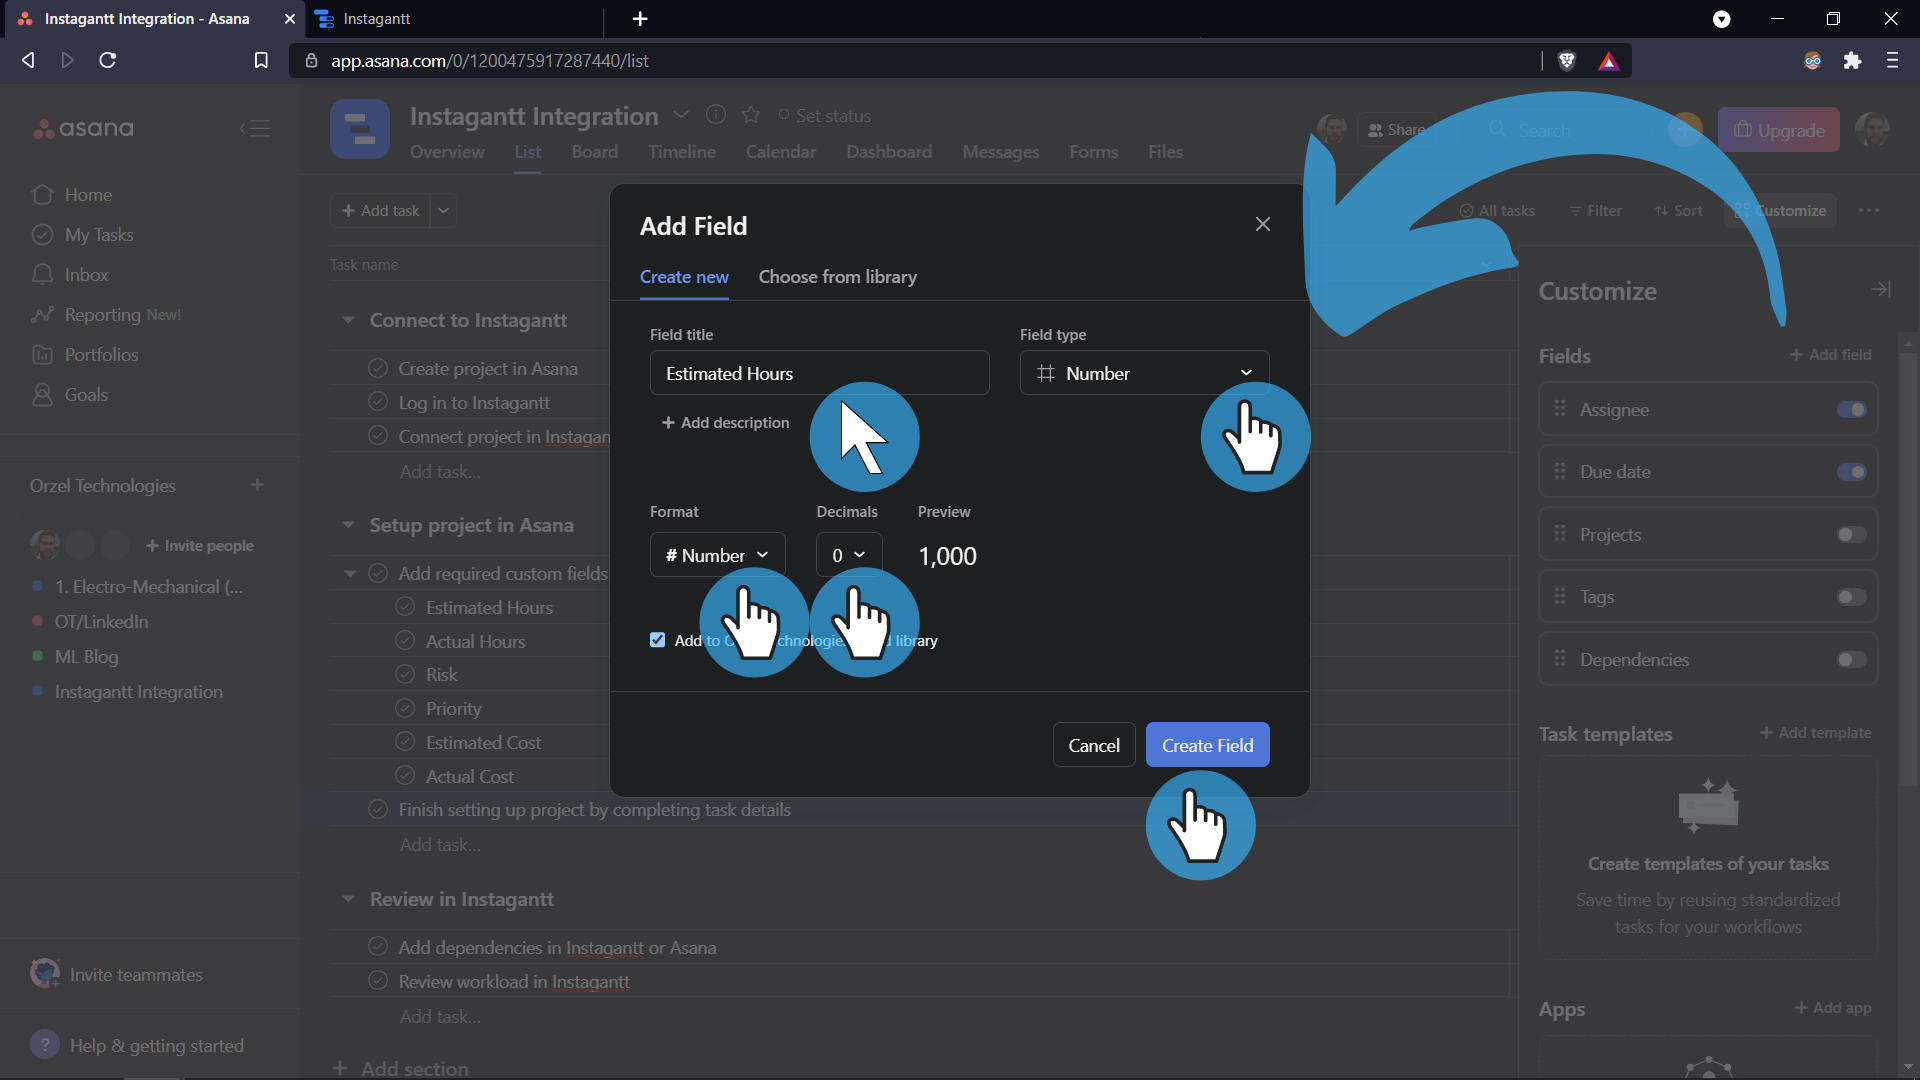
- Select the create new tab and fill out the information as required ensuring that the Field title is spelled just like the Instagantt column name.
See the table below to see how we setup our custom fields.
| Field title | Field type | Format | Decimals |
| Estimated Hours | Number | # Number | 0 |
| Actual Hours | Number | # Number | 1 |
| Estimated Cost | Number | $ CAD | 0* |
| Actual Cost | Number | $ CAD | 2 |
| Risk | Number | # Number | 0 |
| Priority | Number | # Number | 0 |
*Note that Instagantt will add two decimal places

Step 4: Fill out the custom field information
The custom fields can be populated either in Asana or Instagantt and will sync from now on. We prefer setting everything in Asana – except dependencies!


Step 5: Add dependencies in Instagantt
Adding dependencies in Asana is not very fun. We don’t really like Asana’s Timeline view which is why we use Instagantt. Instagantt makes the process a breeze.
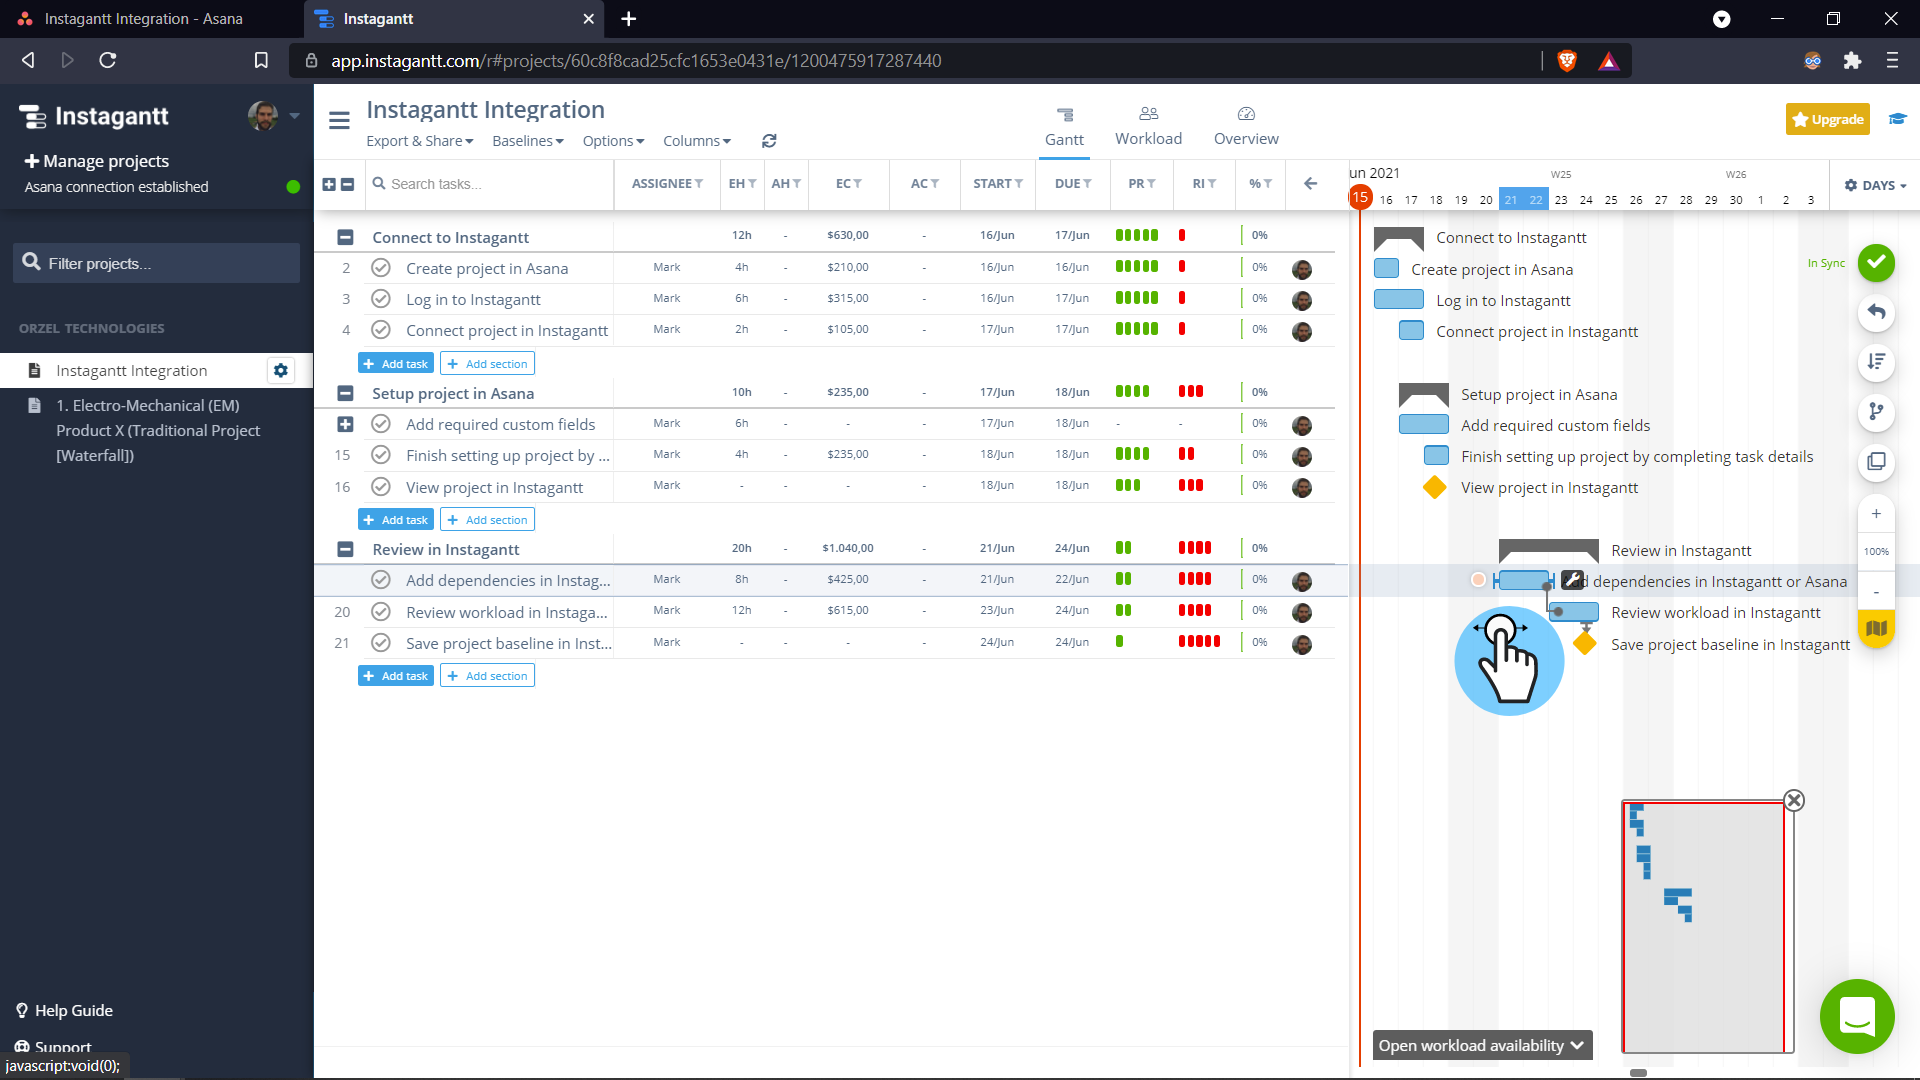
- Hover your mouse over a task bar
- Press and hold the button that appears to the left of the task bar
- Drag and drop it onto the blocking task bar
- Repeat steps 1 through 3 as required
If you make a mistake, right click or press the wrench icon and unlink the task.
Your project is now setup!

Use Asana’s Custom Fields in Instagantt – Details and Benefits
In our next post we will expand on some of the details of the synced custom fields and some of the major benefits!
Thank you for reading!
Orzel Technologies is a participant in the Amazon Services LLC Associates Program, an affiliate advertising program designed to provide a way for websites to earn advertising revenues by advertising and linking to Amazon.ca.
Leave A Comment